Drupal, like many other CMS tools, is most often used to run entire websites. This means that, by default, Drupal expects path names to start from the root directory. If
you're developing for multiple sites from a single desktop (or laptop/notebook) computer, it can be a real hassle to deal with changing base_urls paths for each installation of Drupal that you develop for. A much more elegant solution
would be to treat your local workstation as a personal development server, with a unique non-routable host name, for each site you're working on.
Setting up Drupal on a virtual host involves several steps. Below is a step-by-step guide for setting up Drupal on an Apache virtual host in an Ubuntu environment.
- Ubuntu server or Desktop.
- Apache web server.
- Mysql or MariaDB database server.
- PHP and required Extensions.
- Drupal installation files.
Here are the steps to cofigure the virtual host for setup the Drupal.
Step 1:- Install Apache, MySql and PHP
- Update your package index.
sudo apt update
- Install Apache.
sudo apt install apache2
- Install MySql
sudo apt install mysql-server
- Install PHP and required extensions.
sudo apt install php libapache2-mod-php php-mysql php-gd php-xml php-mbstring php-curl php-zip php-xmlrpc php-soap
Step 2:- Configure MySql.
- Secure MySql installation.
sudo mysql_secure_installation
- Log in to MySql.
sudo mysql -u root -p
- Create a database and user for Drupal.
CREATE DATABASE drupal;
CREATE USER 'drupaluser'@'localhost' IDENTIFIED BY 'your_password';
GRANT ALL PRIVILEGES ON drupal.* TO 'drupaluser'@'localhost';
FLUSH PRIVILEGES;
EXIT;
Step 3:- Download and Extract Drupal.
- Navigate to the web root directory.
cd /var/www/html
- Download the latest version of Drupal.
sudo wget https://www.drupal.org/download-latest/tar.gz -O drupal.tar.gz
- Extract the Drupal files.
sudo tar -xzvf drupal.tar.gz
- Move the extracted files to a directory name “drupal”.
sudo mv drupal-x.x.x drupal
- Set the correct permissions.
sudo chown -R www-data:www-data/var/www/html/drupal
sudo chmod -R 755 /var/www/html/drupal
Step 4:- Configure Apache Virtual Host.
- Create a new virtual host file for Drupal.
sudo nano /etc/apache2/sites-available/drupal.conf
- Add the Following configuration to the files.
<VirtualHost *:80>
ServerAdmin webmaster@your_domain.com
ServerName your_domain.com
ServerAlias www.your_domain.com
DocumentRoot /var/www/html/drupal
<Directory /var/www/html/drupal>
Options FollowSymLinks
AllowOverride All
Require all granted
</Directory>
ErrorLog ${APACHE_LOG_DIR}/error.log
CustomLog ${APACHE_LOG_DIR}/access.log
combined
</VirtualHost>
- Enable the new virtual host and rewrite module.
sudo a2ensite drupal.conf
sudo a2enmod rewrite
- Restart Apache to apply the changes.
sudo systemctl restart apache2
Step 5:- Complete Drupal Installation via web browser.
- Open a web browser and navigate to your browser.
http://your_domain.com
- Follow the on-screen instruction to complete the Drupal Installation.
Select the language.
Verify Requirements.
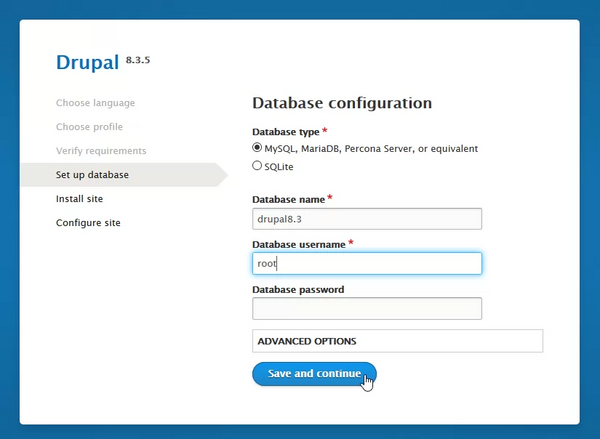
Set up the database using the details you created earlier(‘drupal’, ‘drupaluser’, ‘your_password’).
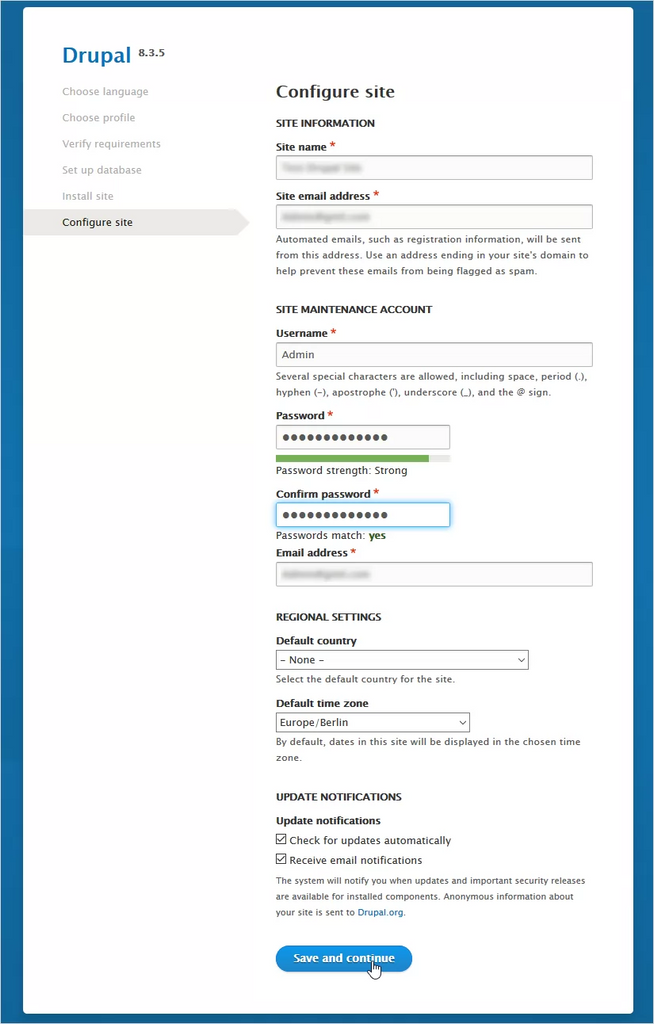
Configure your site.


Step 6:- Final configuration.
- Secure the ‘settings.php’ file.
sudo chmod 444/var/www/html/drupal/sites/default/settings.php
- Optional : setup crn jobs for regular maintenance.
sudo crontab -e
- Add the following line to run Drupal’s cron every hour.
0 * * * * /usr/bin/php /var/www/html/drupal/cron.php
 WhatsApp


