Sliders in WordPress are incredibly functional and versatile. Whether you're running an online shop, a portfolio site, or a blog, sliders can grab your visitors' attention and present information in an engaging way. In this article, we'll guide you through creating a slider in WordPress using the Smart Slider 3 plugin, without needing to write a single line of code.
What is a slider?
At its core, a slider is a collection of photos with automatic playback or user-controlled playback. However, sliders can be much more advanced. They can include:
Text: Add captions, headings, and descriptions to provide context or additional information.
Images and Videos: Display media to enhance visual appeal and engagement.
Buttons: Add calls to action that direct users to different parts of the slider or external websites.
Animations and Effects: Apply animations to text and images and use transition effects between slides to create a dynamic experience.
Smart Slider 3 allows you to create both basic and complex sliders, offering plenty of creative freedom along with stylish templates to help you get started.
Step-by-Step Guide to Creating a Slider with Smart Slider 3
Step 1: Install and Activate Smart Slider 3
- Login to your WordPress Dashboard
- Navigate to Plugins > Add New
- Search for “Smart Slider 3.”
- Click “Install Now” on the Smart Slider 3 plugin.
- Once installed, click “Activate.”

Step 2
- Go to Smart Slider in the WordPress dashboard menu.

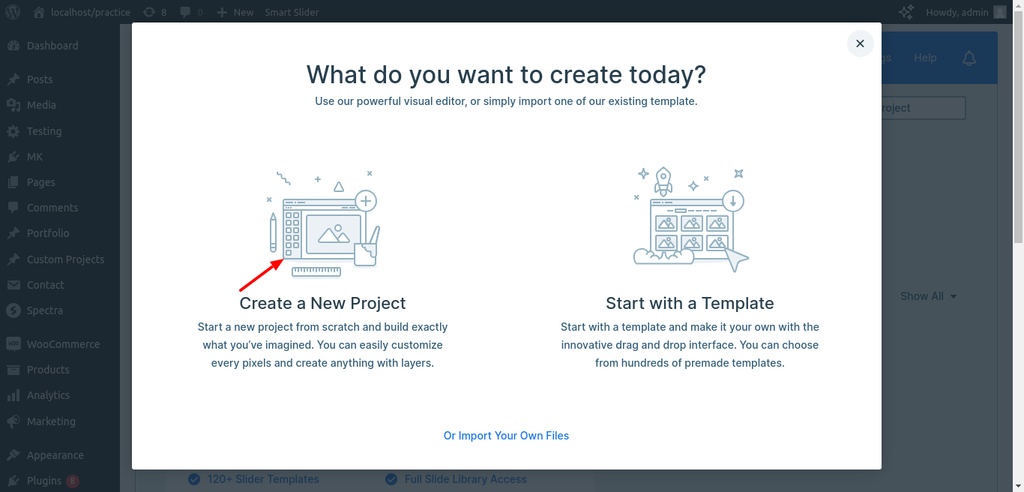
- Click on New Project.
- Choose New Slider.
- Name your slider and set the dimensions. For most purposes, 1200x500 pixels is a good starting point, but you can adjust this based on your needs


Step 3: Add Slides to Your Slider
- Click on Add Slide
- Choose to add an image, video, or create a blank slide.
- Upload images or select from your media library.

Step 4: Customize Each Slide
- Click on a slide to edit it.
- Add elements like text, buttons, images, and videos. Drag and drop elements onto the slide.
- Customize the appearance and position of each element.
- Use the animation options to add entrance and exit animations to your elements.

Step 5: Configure Slider Settings
- Go to the “Settings” tab for your slider.
- Adjust the slider settings such as autoplay, slide duration, and transition effects.
- Set the navigation style, like arrows, dots, or thumbnails.

Step 6: Publish Your Slider
- Click Save to save your slider.
- Copy the shortcode provided.

Step 7: Add the Slider to Your WordPress Site
- Go to the page or post where you want to add the slider.
- Paste the shortcode into the WordPress editor.
- Update or publish your page.

 WhatsApp


