Exporting your present Wordpress website to a backup generated in a single file with the.wpress extension with the All-in- One WP Migration plugin allows you import any other Wordpress website from this backup.
In addition to the All-in- One WP Migration plugin allows you create consistent backups of your website, also migrate a Wordpress from one local or public domain to another domain and even move a Wordpress between hosting providers.
Step 1: Install the All-In-One WP Migration Plugin
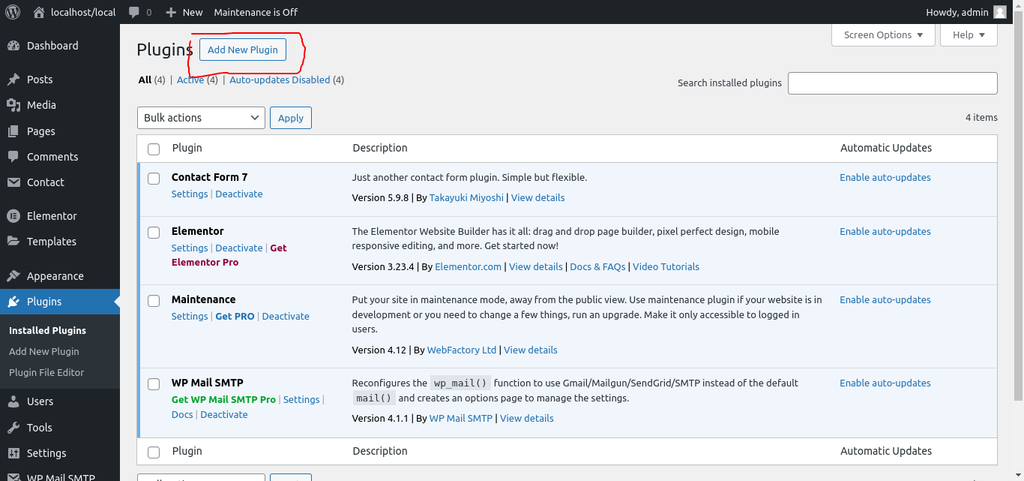
Install and activate the All-in- One WP Migration plugin on your WordPress dashboard to start your site migration. Visit Plugins → "Add New Plugin," locate the plugin, then click " Install Now".


Few seconds later, you will be able to choose "Activate".

A link to the All-In-One WP Migration plugin will show up in the WordPress dashboard's sidebar if the installation was successful.

Step 2: Exporting your WordPress website
All you have to do is navigate to your WordPress dashboard's All-in-One WP Migration feature. Next, select Export:

When you select "Export To," you will be presented with a new set of possibilities. For example, you can export your website to Dropbox, Google Drive or Google Cloud. Alternatively, you can just download your website as a file to your PC, which is what we will do in this guide:

The export process will start. This usually takes just a few seconds. However, this process could take a little longer if your website is exceptionally huge and contains a lot of data (like an e-commerce shop).
Next, click the download link in the pop-up box to download your website as a single file with the.wpress extension:

Additionally, the All-in-One WP Migrator plugin will provide you with a copy of the same wpress file that you previously downloaded in the "Backups" section. You can use this copy as a backup in case you need to restore WordPress on your current hosting, download the.wpress file again to your PC, delete it from WordPress, or Import the website

We will import the website using the procedures below, which should already have the All-in-One WP Migration plugin installed on the new WordPress installation before we begin the import process:
Click "Import" under "All-in-One WP Migration" in your WordPress dashboard.

Then click the "Import From" button and select the "File" option.

The plugin will notify you that this process will replace your existing WordPress database, media, plugins, and themes. Click the "Proceed" button.

At this point, the import process will start. The length of time required will be determined by the size of the migration file and your new server.
You will receive a confirmation notice stating that "Your site has been successfully imported!" and instructing you to "Save the permalink structure".
To complete the import procedure, click the "Finish" button.

Your WordPress migration is almost finished at this stage. All you have to do now is reset the permalinks on the newly imported WordPress.
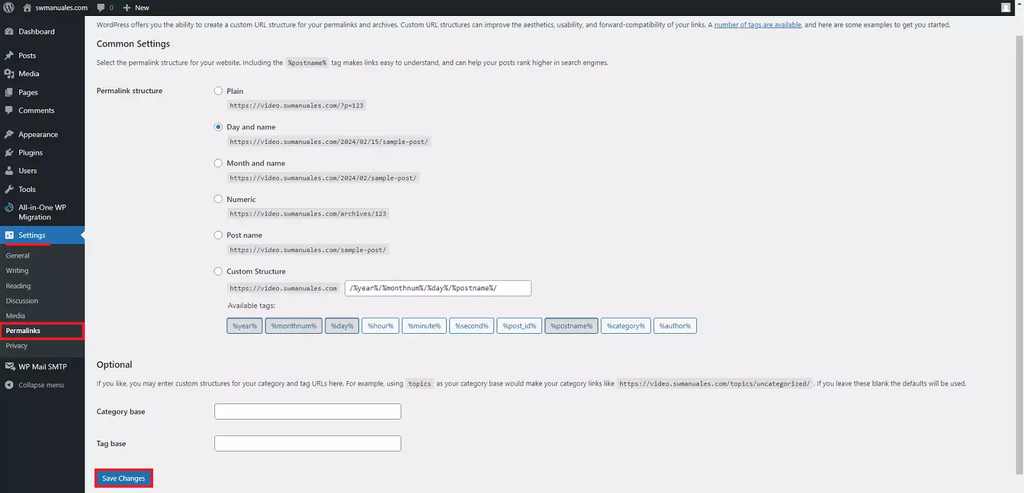
In your new WordPress dashboard, navigate to "Settings" > "Permalinks" and click the "Save Changes" button.

Congratulations! You have successfully migrated and configured your WordPress

 WhatsApp


