By including interesting sliders to your product pages, home page or any other part of your site, Slick Slider is a flexible and adaptable carousel plugin that will improve the visual attractiveness of your Shopify store. This article will guide you through using Liquid code to integrate the Slick Slider into your Shopify store.
Step 1: Download Slick Slider
Download Slick Slider Files:
- Download the newest version of the Slick Slider plugin from the Slick Slider GitHub page or the official Slick Slider website.
- Extract the downloaded files. You'll find CSS and JavaScript files inside.
Upload Slick Slider files to Shopify
- Go to your Shopify admin panel.
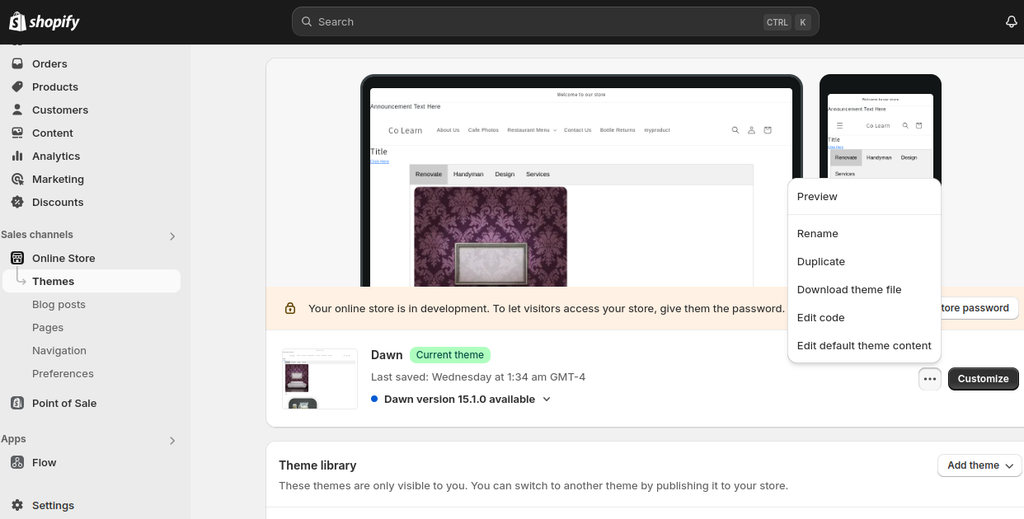
- Navigate to Online Store > Themes > Actions > Edit code.

- In the Assets folder, click Add a new asset.

- Upload the slick.css, slick-theme.css, slick.min.js, and jquery.min.js files (if not already included in your theme).
Step 2: Add Slick Slider Files to Your Theme
Include CSS Files:
- Open your theme's theme.liquid file, which is usually found under Layout.

- Add the following code within the <head> tag to include the Slick Slider CSS files:
<link rel="stylesheet" type="text/css" href="{{ 'slick.css' | asset_url }}" />
<link rel="stylesheet" type="text/css" href="{{ 'slick-theme.css' | asset_url }}" />
Include JavaScript Files:
- To include the Slick Slider JavaScript files, add the following code to the theme.liquid file just before the closing tag:
<script src="{{ 'slick.min.js' | asset_url }}"></script>
Step 3: Add Slick Slider HTML Markup
Choose Where to Add Your Slider:
- Add the following HTML where you want the slider to appear:
<div class="container">
<div class="row responsive">
{% for block in section.blocks %}
<div class="col-md-3">
<div class="slick_images">
{% if block.settings.images != blank %}
<img src="{{ block.settings.images | img_url:'' }}">
{% endif %}
</div>
</div>
{% endfor %}
</div>
</div>
</div>
Step 4: Initialize Slick Slider with JavaScript
Add Initialization Script:
- Open the theme.liquid file or create a new JavaScript file in the Assets folder (e.g., custom-slick.js).
- Add the following script to initialize Slick Slider:
$('.responsive').slick({
dots: false,
infinite: false,
arrow:true,
speed: 300,
slidesToShow: 4,
slidesToScroll: 1,
responsive: [
{
breakpoint: 1024,
settings: {
slidesToShow: 4,
slidesToScroll: 1,
infinite: true,
dots: false
}
},
{
breakpoint: 600,
settings: {
slidesToShow: 2,
slidesToScroll: 2
}
},
{
breakpoint: 480,
settings: {
slidesToShow: 1,
slidesToScroll: 1
}
}
]
});
- Customize the options (like dots, infinite, speed, etc.) based on your preferences.
Link the JavaScript File (if created a separate file):
- if you created a separate JavaScript file, make sure it’s linked in the theme.liquid file just before the closing </body> tag:
<script src="{{ 'custom-slick.js' | asset_url }}"></script>
Step 5: Test Your Slider
Preview Your Store:
- Go to your store's front end and select the page where you added the slider.
- Check that the Slick Slider is working properly, and that the pictures and functionality are as expected.
Debug if Needed:
- If the slider does not appear or is not working properly, check the browser's console for JavaScript issues.
- Make sure the jQuery and Slick Slider scripts are properly included and that there are no conflicts with other JavaScript code.

Conclusion
Adding a Slick Slider to your Shopify store can significantly increase its visual appeal and user engagement. By following these instructions, you'll have successfully linked Slick Slider with Liquid code, HTML and JavaScript. Don't forget to customize the slider settings and styles to your store's branding and appearance.
 WhatsApp


